TTN Guide

TTN Guide

This TTN Guide will guide you step-by-step on how to install the sensors in the TTN Console. When the guide is completed you will be able to see your application, your registered devices, and read data. Remember to create an account before starting this guide. 

1. New Application

Click on “Go to applications” to add a new one. 

2. Add application

Select an owner and provide the application with an ID. It is optional to add a name and description.  

3. New device

Click on “Add end device to begin.

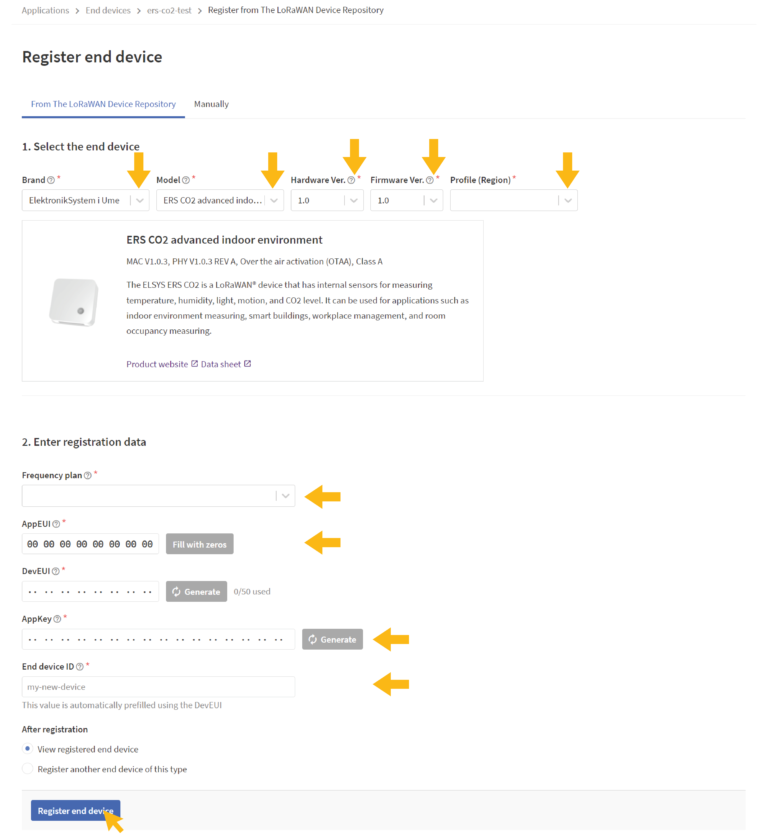
4. Register end device

1. Select the end device.
Select the brand, model, hardware & firmware version, and region for your product. If your device’s hardware or firmware version is not yet included in the list, select 1.0.  

2. Enter registration data.
Select a frequency plan and then fill in AppEUI, DevEUI, and AppKey for your device. The AppEUI is default 0000000000000000. This can be changed if needed. The DevEUI can be found on the back of the sensor or by reading the sensor using our app Sensors settings on a smartphone. The AppKey can also be found by reading the sensors with our app.

There is also an option to generate a new AppKey in TTN’s console. This option requires that you change the sensor’s settings so that the AppKey matches the one you now have in the console. Use our app to configure the device.  

5. Payload

Click on ”Payload Formatters”.

6. Change payload

Choose ”Repository” on both uplink and downlink to use our TTN decoder. Choose ”custom” for the use of other decoders. If you have used our decoder, test to see if it is valid with ”0100e202290400270506060308070d62”. The sensors data should now be visible as below.

If you still are having troubles with the installation of your devices, please contact our support and we will do our best to help you.